Using Qiskit on Amazon Braket
This article explains how to use Qiskit from an Amazon Braket notebook, one of the quantum computing services provided by AWS.
Amazon Braket Learning Course
A course on Amazon Braket, AWS’s quantum computing service, has been released.

This course is designed for those with no prior knowledge of quantum computing or AWS, and by the end, you’ll even be able to learn about quantum machine learning. Take advantage of this opportunity to build your skills in quantum technologies!
Using Qiskit on Amazon Braket
Amazon Braket notebook instances, one of the quantum computing services provided by AWS, come pre-installed with quantum computing SDKs such as the Amazon Braket SDK, Qiskit, and PennyLane.
In this article, we will explain how to run a quantum circuit using Qiskit. First, launch an Amazon Braket notebook instance and open a new file. Please note that charges apply based on the duration the notebook instance is running.
You can import the modules just like you would with standard Qiskit, as shown below.
import qiskit
from qiskit import QuantumCircuit
At the time of writing this article, Qiskit 1.2.0 is installed by default.
print(qiskit.__version__)
#1.2.0
You can define quantum circuits just as usual. In this example, we are creating a Bell circuit.
circuit = QuantumCircuit(2)
circuit.h(0)
circuit.cx(0, 1)
The method for executing quantum circuits differs from standard Qiskit. Below is an example code for using a local simulator. The backend is defined in a variable called local_simulator, and the circuit is executed 100 times.
from qiskit_braket_provider import BraketLocalBackend
local_simulator = BraketLocalBackend()
local_task = local_simulator.run(circuit, shots=100)
The method for checking the results is the same as in standard Qiskit.
print(local_task.result().get_counts())
#{'11': 44, '00': 56}
As usual, you can view the histogram using the following code.
from qiskit.visualization import plot_histogram
plot_histogram(local_task.result().get_counts())
If you want to use an Amazon Braket managed simulator, you can check the available simulators using the following command.
from qiskit_braket_provider import BraketProvider
provider = BraketProvider()
provider.backends(statuses=["ONLINE"], types=["SIMULATOR"])
#[BraketBackend[SV1], BraketBackend[TN1], BraketBackend[dm1]]
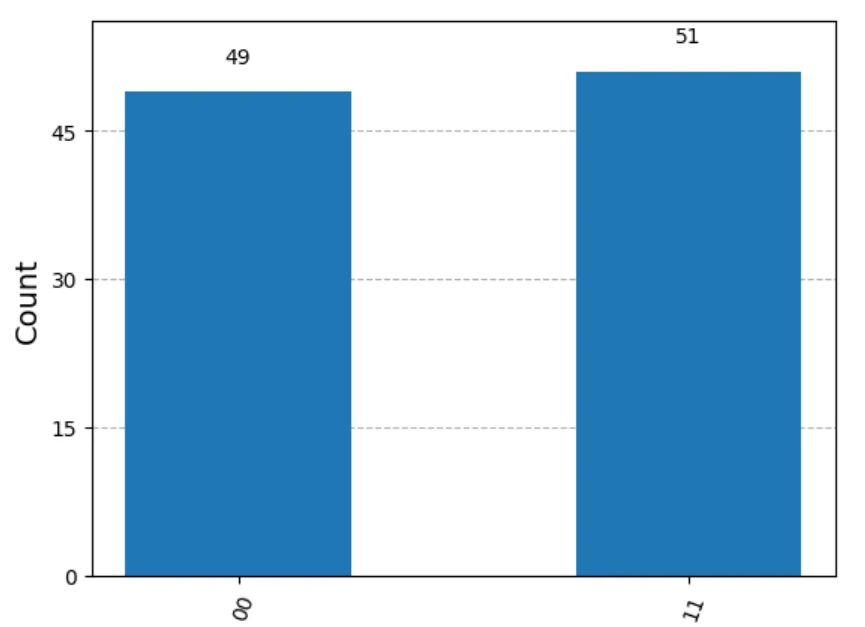
For example, to run a circuit using the SV1 simulator, you can write the code as shown below. Please note that charges will apply based on the duration of usage.
sv1 = provider.get_backend("SV1")
sv1_task = sv1.run(circuit, shots=100)
print(sv1_task.result().get_counts())
#{'00': 48, '11': 52}
Qiskit 2.0 has been released. In this article, we will explain how to run a simple quantum circuit using Qiskit 2.0.1.
Amazon Braket Learning Course
A course on Amazon Braket, AWS’s quantum computing service, has been released.
This course is designed for those with no prior knowledge of quantum computing or AWS, and by the end, you’ll even be able to learn about quantum machine learning. Take advantage of this opportunity to build your skills in quantum technologies!